登陆页面验证码的简单实现

本文最后更新于:3 years ago

这里介绍一下,我们平常在登陆时,所需要的检验的简单的验证码是怎么实现的,这里只介绍大概的步骤,了解原理即可。(为什么写这个呢,因为比较晚了,今天又有一些原因,不太学的进了,又不想这么早就滑手机,就简单记录一下,娱乐时间-1h)

至于美化的话,在开发时一般时是借助别人的代码。。。

这里先贴上大概实现的样图,可能很简陋(不好看?),美化什么的,我就没有弄了。


先介绍涉及到的类

提前须知

Bfferedimage类

Image是一个抽象类,BufferedImage是其实现类,是一个带缓冲区图像类,主要作用是将一幅图片加载到内存中(BufferedImage生成的图片在内存里有一个图像缓冲区,利用这个缓冲区我们可以很方便地操作这个图片),提供获得绘图对象、图像缩放、选择图像平滑度等功能,通常用来做图片大小变换、图片变灰、设置透明不透明等。

ImageIO

提供read()和write()静态方法,读写图片,比以往的InputStream读写更方便。

Graphics类

提供基本绘图和显示格式化文字的方法,画图用的坐标系原点在左上角,纵轴向下。主要有画线段、矩形、圆、椭圆、圆弧、多边形等各种颜色的图形、线条。

大体分析

创建对象

先创建BufferedImage对象,在内存中的图片。创建大概就如下图所示

1
2
3
4
5
6
//1.创建对象
//1.1设置宽高
int width = 100;
int height = 50;
//1.2创建对象
BufferedImage image = new BufferedImage(width, height, BufferedImage.TYPE_3BYTE_BGR);


美化图片

接着就是美化图片,大概就是改变背景色加边框,再加上画干扰线

1
2
3
4
5
6
7
8
9
10
11
12
13
14
15
16
17
18
19
20
21
//2. 美化图片
//2.1 填充背景色
Graphics g = image.getGraphics();// 画笔对象
g.setColor(Color.PINK);// 设置背景颜色
g.fill3DRect(0,0,width, height, true);

//2.2 画边框
g.setColor(Color.blue);// 设置边框颜色
g.draw3DRect(0, 0, width-2, height-2, true);

//2.3 画干扰线
g.setColor(Color.GREEN);// 设置干扰线颜色
for (int i = 1; i <= 7; i++) {
//随机生成坐标点
//x1、y1即线的起始坐标,x2、y2即线的终点坐标
int x1 = ran.nextInt(width);
int y1 = ran.nextInt(height);
int x2 = ran.nextInt(width);
int y2 = ran.nextInt(height);
g.drawLine(x1, y1, x2, y2);//"画进内存"
}


验证码实现

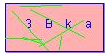
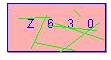
验证码的实现,原理就是字符串中随机取出四个值,打印到图片上

1
2
3
4
5
6
7
8
9
10
String str = "abcdefghijklmnopqrstuvwxyzABCDEFGHIJKLMNOPQRSTUVWXYZ0123456789";// 验证码就在这其中取
//生成随即图标
Random ran = new Random();

//写验证码
for (int i = 1; i <= 4; i++) {
int index = ran.nextInt(str.length());//随机生成index下标
char ch = str.charAt(index);//取值
g.drawString(ch+"", width/10*(i*2), height/2);//打印
}


图片输出

将图片输出到页面

1
ImageIO.write(image, "jpg", response.getOutputStream());

完整代码

1
2
3
4
5
6
7
8
9
10
11
12
13
14
15
16
17
18
19
20
21
22
23
24
25
26
27
28
29
30
31
32
33
34
35
36
37
38
39
40
41
int width = 100;
int height = 50;

//创建对象
BufferedImage image = new BufferedImage(width, height, BufferedImage.TYPE_3BYTE_BGR);

//背景色
Graphics g = image.getGraphics();// 画笔对象
g.setColor(Color.PINK);
g.fill3DRect(0,0,width, height, true);

//边框
g.setColor(Color.blue);
g.draw3DRect(0, 0, width-2, height-2, true);

String str = "abcdefghijklmnopqrstuvwxyzABCDEFGHIJKLMNOPQRSTUVWXYZ0123456789";
//生成随即图标
Random ran = new Random();

//干扰线
g.setColor(Color.GREEN);
for (int i = 1; i <= 7; i++) {
//随机生成坐标点
int x1 = ran.nextInt(width);
int y1 = ran.nextInt(height);
int x2 = ran.nextInt(width);
int y2 = ran.nextInt(height);
g.drawLine(x1, y1, x2, y2);
}


//验证码
for (int i = 1; i <= 4; i++) {
int index = ran.nextInt(str.length());
char ch = str.charAt(index);
g.drawString(ch+"", width/10*(i*2), height/2);
}


//输出
ImageIO.write(image, "jpg", response.getOutputStream());

参考文章

BufferedImage类、Image类、Graphics类


本博客所有文章除特别声明外,均采用 CC BY-SA 4.0 协议 ,转载请注明出处!